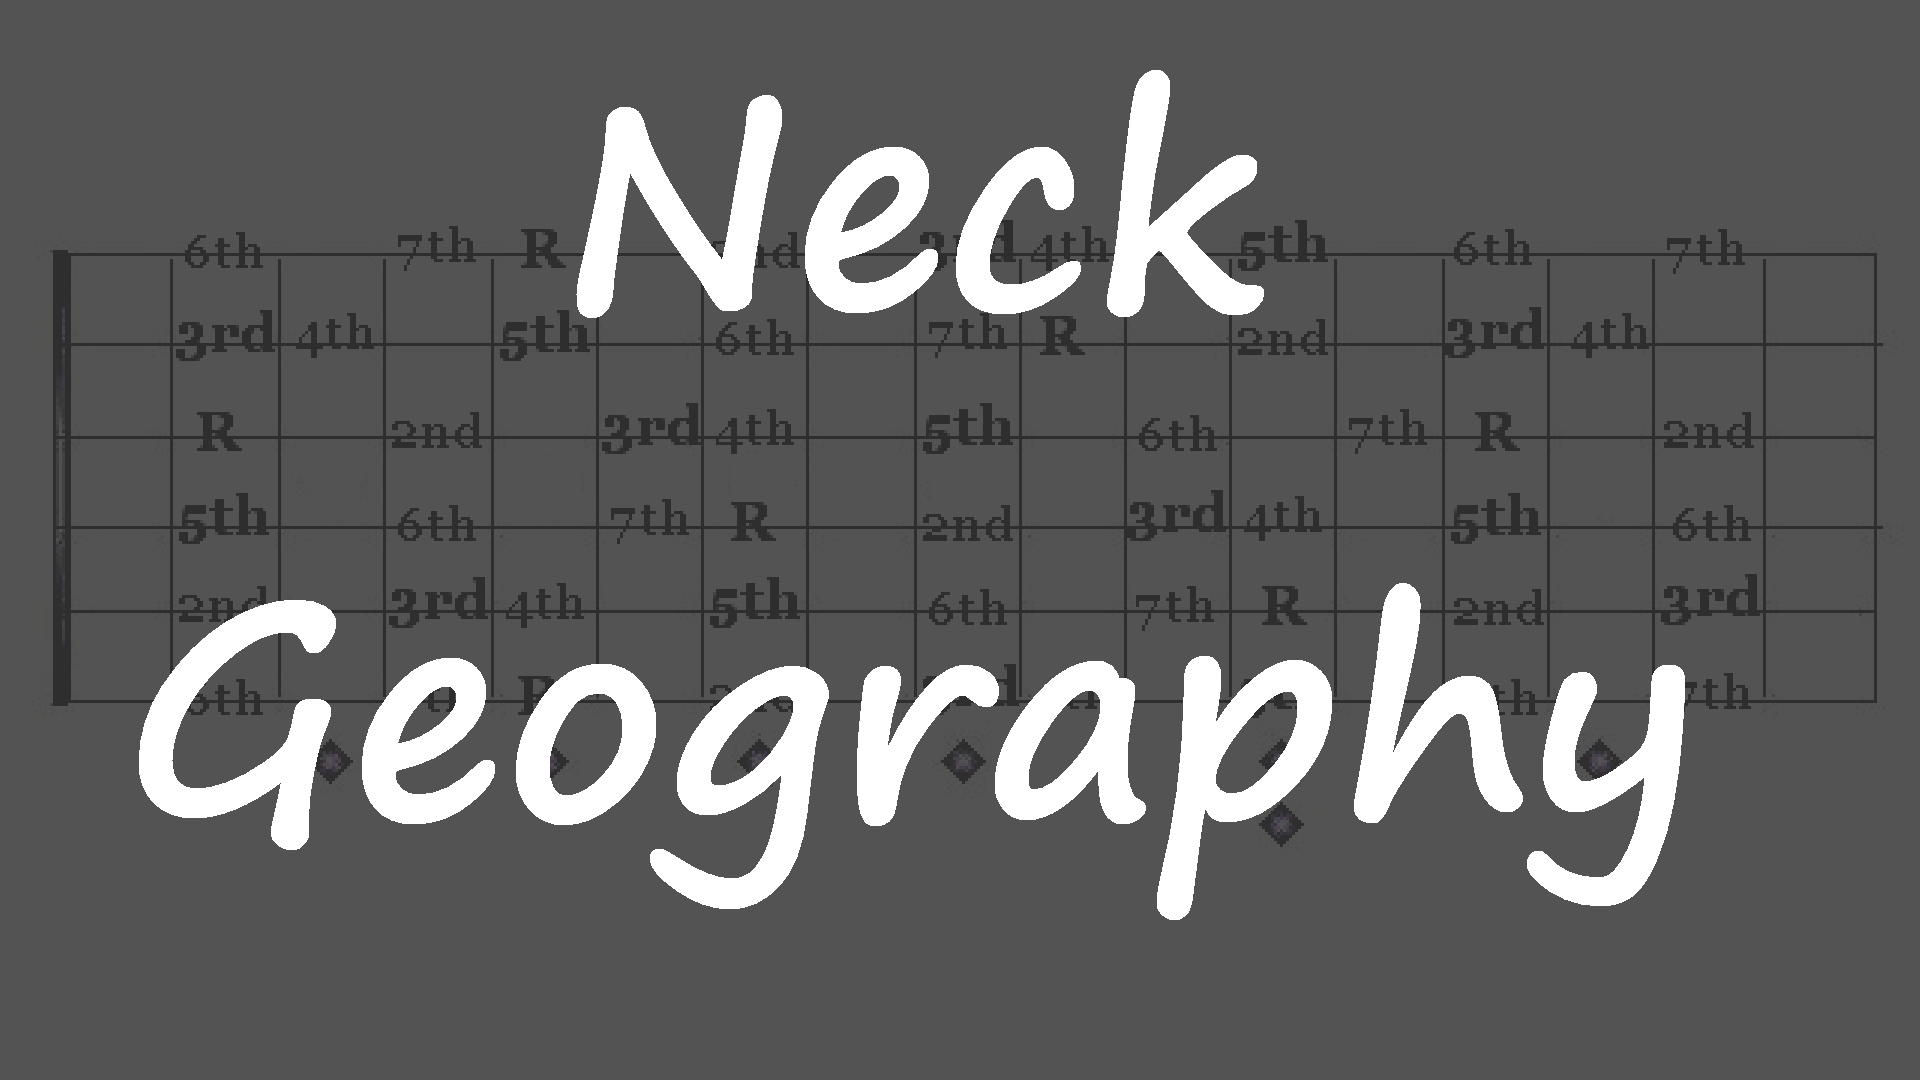
Introduction:
I wasn’t sure if I wanted to do a lesson on the neck visualization subject. There is already so much on this subject through out the internet and in fact; there is no better or worst method to learn to visualize your neck, there is just different approach for different guitarists background or aspirations. What convince me to do this lesson is that the approach I am using isn’t thought a lot on the internet, at least from what I’ve seen. My approach is very simple; It consist of being able to visualize intervals distance on your neck. Once you are comfortable with visualizing intervals distance it is easy to build any chords, scales, arpeggios or melodic patterns on the moment. I really feel this competence is the missing link for a lots of guitarists and that is why I am doing a lesson on this subject. It will demand some work to really master this competence, especially for those who are used to think in terms of scales. But the reward will worth the effort I promise!
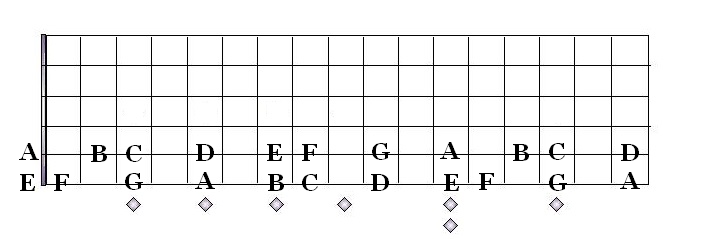
First thing you will need to know to apply my approach is your notes on the 2 lower strings. The guitar, being more often used as an accompaniment instrument, this should be already acquired but here’s a diagrams just in case you’ll need a little refresh.
To apply this method we will start by learning all interval shapes in 4 positions. These four positions will cover the whole neck. All other middle positions will then, be easy to figure. The 4 positions will be as followed:
- Behind the root, root on 6th string (G shape)
- Ahead of the root, root on 6th string (E shape)
- Behind the root, root on 5th string (C shape)
- Ahead of the root, root on 5th string (A shape)
These four positions should be very intuitive since guitarists are used to relate to bass notes when playing and they are based on shapes that you should be very familiar with. This method of organizing positions is often called the ‘CAGED’ method, because of the shapes names. I didn’t include the D shapes since it is a middle position. We will discuss middle positions later.
Here we go with the first positions:
We will use an A major chord to demonstrate the four positions. This will be our starting frame and we will later expand starting from this shape.
- Behind the root, root on 6th string (G shape)
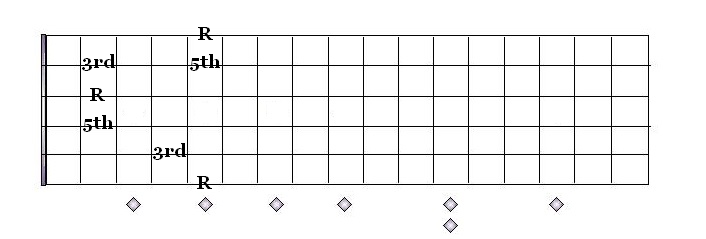
Note that I have written the intervals names instead of just writing dots. The most important aspect of this lesson is to be able to identify the intervals in those shapes. By knowing those simple intervals you will then be able to deduct other intervals.
Let see the other positions:
- Ahead of the root, root on 6th string (E shape)
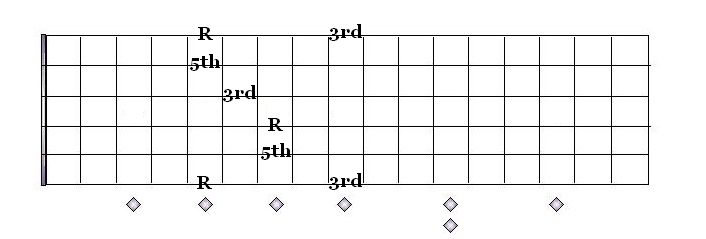
- Behind the root, root on 5th string (C shape)
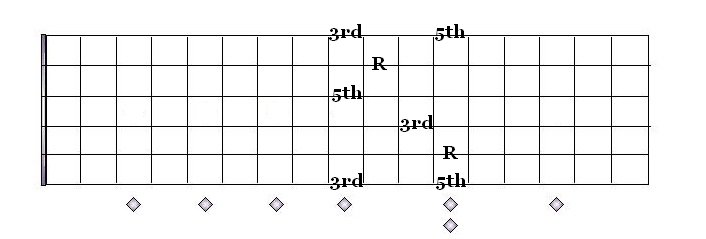
- Ahead of the root, root on 5th string (A shape)
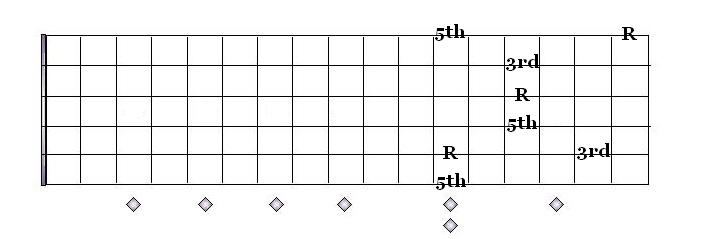
So without noticing it we are already covering the whole neck!
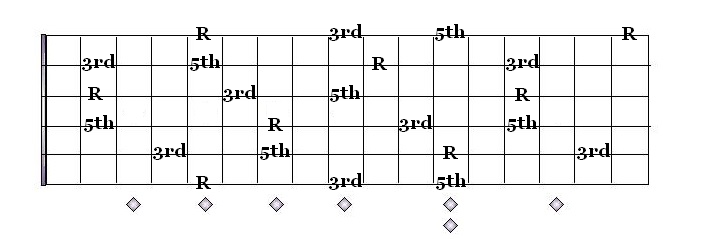
These are the 4 main positions we will be working with but, there are 3 more middle positions we can now figure. It is:
- Under the root, root on 6th string (F shape)
- Under the root, root on 5th string (B shape)
- Ahead of the root, root on 4th string (D shape)
You can try to figure them using the whole neck diagram. The F shape and the B shape shouldn’t be to hard to figure. Just start with the index on 4th fret for the F shape and the index on 11th fret for the B shape. We will not discuss those ones more than this since they are included in previous shapes and are very easy to deduct.
The D shape is a bit more tricky to figure and is also used a lot by Jazz guitarists. His root is on the 4th string so, knowing the notes on the 4th string is a must to use this position. You can also deduct your 4th string notes using the octave shapes starting on the 6th string.
Here’s the diagram for the D shape
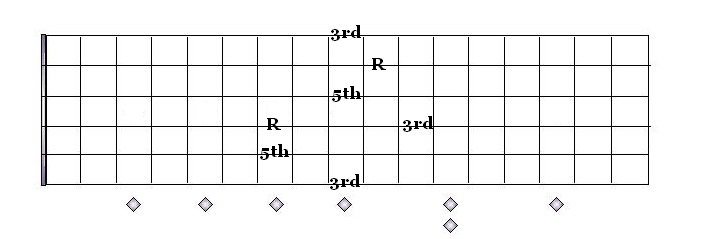
Now that we covered the 4 main positions and the 3 middle positions using a major chord. It would be a great exercise to build all the same shapes but with a minor chord. Just lower the 3rd an half tone on every positions to build a minor chord. Note that sometime you will have to move the note to a lower string to keep it in the desired position.
In the next part we will check how to deduct other intervals. Then we will be able to build lines that take into account the melodic value of each notes to achieve what some calls ‘melodic control’. Have fun! Cheers!
